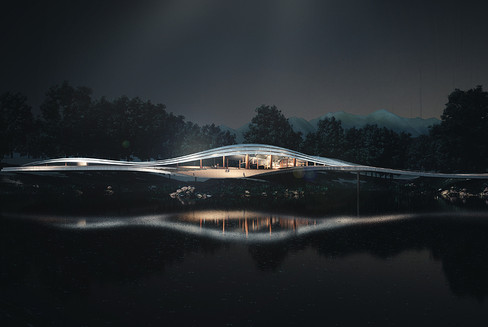
Best Real-time Rhino Rendering Workflow for you with D5 Render
- D5 Render Official

- Sep 21, 2022
- 3 min read
Table of Contents:
Rhinoceros 3D is a powerful and user-friendly 3D modeling software that's widely used by architects and industrial designers from all around the world. It includes a complete set of tools including all the general tools, transform tools, points and curves options and surface features to help with the development of projects. D5 Render, an equally handy visualization program, is compatible with this CAD tool, providing Rhino users with a smooth-running modeling-to-rendering experience.
Start Rhino-D5 Live-sync
With the free direct-link plugin D5 Converter-Rhino, you can now benefit from this streamlined visualization workflow. Download D5 Converter-Rhino from Workflow section in D5 Render software, or from D5 Render official website. After installation, the D5 Converter tab will appear in Rhino. Before starting the livesync, you can separate Rhino materials apart with different colors for easier editing later.

1. Start & Stop D5
Click on "Start D5" to launch D5 Render and sync the Rhino model into D5.
2. Sync
After making changes to objects in Rhino, you can use the "Sync" button to quickly update the material and model changes in D5. This won't replace materials or scenes that have been adjusted in D5.
3. View On/Off
When view sync is on, the viewports of Rhino and D5 Render will be consistent.
4. Send Scenes
By clicking on "Send Scenes" button, the views set in Rhino can be synchronized to the scene list of D5 Render.
5. Send Lights
Light groups in Rhino can be synced into D5 Render by clicking on "Send Lights", keeping the light sources well organized. Apart from live sync with D5 Converter, D5 Render can directly read .3dm files as well. You can divide a project into parts, for example: building, ground and lights, and import them separately into D5.
How to bring your scenes to life with D5 Render
After importing the models from Rhino to D5 Render, you can start an enjoyable rendering tour in D5.
Material/texture
D5 is not only advantaged in its PBR material system, it also makes material/texture adjustment so easy and efficient.
D5 added a one-click thickness simulation option to fix the incorrect refraction effect when you forget to add thickness to glass materials. With one click, you don't have to go back to modeling to fix the single-sided transparent materials.
"Round Corner" feature is also supported to automatically create rounded edges that look softer in the scene.

To save time, you can use the short cut key "i" to select and copy an adjusted texture, then paste it to other parts with the shortcut key "o".

Environment
You can choose from the built-in HDRIs (early morning, sunset, partly cloudy, clear sky and more) or import your own custom files for a general lighting effect. Then turn on Fog effect to make the scene more atmospheric.

Properly adjusting Exposure, White Balance, LUT, Bloom and more parameters in the Effect panel will make the scene much more realistic yet artistic.
To resemble an after-rainy street, turn on Precipitation in Environment > Weather. Adjust the strength of rain to 0 and the level of puddle to 0.3.
Assets
D5 Render has three tools to quickly place plants, characters and vehicles: Brush, Scatter and Path.

When the Radius of Brush is set to maximum, the Scatter tool will be activated. This is especially helpful when you want to fill a selected surface with vegetation, for example, lawns. Press Shift and click on a model to add plants on this surface.

The Path tool comes in useful when you want to add plants, characters and vehicles into a long strip, be it straight or crooked.
For plants: After placing trees along a street, you can make them look more natural by randomizing their size, direction, offset distance and more.
For characters: Density, Width of Path parameters are adjustable. You can also decide the direction, and whether or not the path is located on the ground.
For vehicles: Apart from the basic parameters, left/right-hand drive, random color for cars and car lights on/off are also available.
As a finishing touch, choose from the decal assets in D5 like manhole covers and fallen leaves, to make the scene more realistic.
Output
For image rendering, channels export including Material ID, Ambient Occlusion are supported.
For animation making, set camera shots, add keyframes for the characters, and adjust the Easy Ease. There are several options for resolution and format of the clips. With your preferred settings, you're now all set to render. Click "Add to Render Queue" for batch rendering or "Render" for direct output.


Rhino-D5 Render Showcase
Hyunjune Song
Hao
THE TWIST by LINK


Trimanonymous
If you have great Rhino-D5 renderings or tips to share, welcome to submit to gallery@d5techs.com to reach a wider audience.


Comments